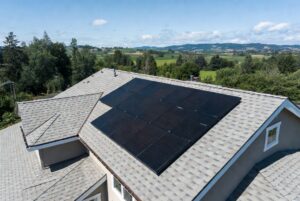
A properly maintained roof is critical for protecting your home from the elements. Yet roofing isn’t always top-of-mind for many homeowners until a leak or major damage crops up. By being aware of common pitfalls—both in routine maintenance and during roof replacements or repairs—you can save time, money, and stress. The key: Knowing where mistakes most often happen and how to avoid them. Below, we’ll explore the top seven roofing errors that homeowners frequently make, along with practical strategies to keep your roof in peak condition.
Neglecting Regular Inspections and Maintenance
One of the biggest oversights is simply not looking at the roof until there’s a visible problem. While the old saying “out of sight, out of mind” might be understandable, it can lead to expensive surprises down the road.
Why This Is a Problem
- Small Issues Grow: Minor cracks in shingles, small patches of missing granules, or a loosened flashing can quickly escalate into leaks and water damage.
- Shorter Roof Lifespan: Regular inspections help prolong a roof’s service life by catching issues early. Delaying fixes can shorten that lifespan.
How to Avoid It
- Schedule Twice-Yearly Checkups: Aim for an inspection every spring and fall—when temperatures are moderate and weather is less extreme.
- Use Binoculars First: If getting on the roof makes you uncomfortable, start by using binoculars to look for missing or curled shingles, sagging areas, or other visible damage.
- When in Doubt, Call a Pro: Professional roofers can do a thorough inspection, checking your attic for potential leaks and your shingles for damage that might be overlooked.
According to the National Roofing Contractors Association (NRCA), routine inspections can potentially double the life of a typical roof, making that quick check well worth your time.
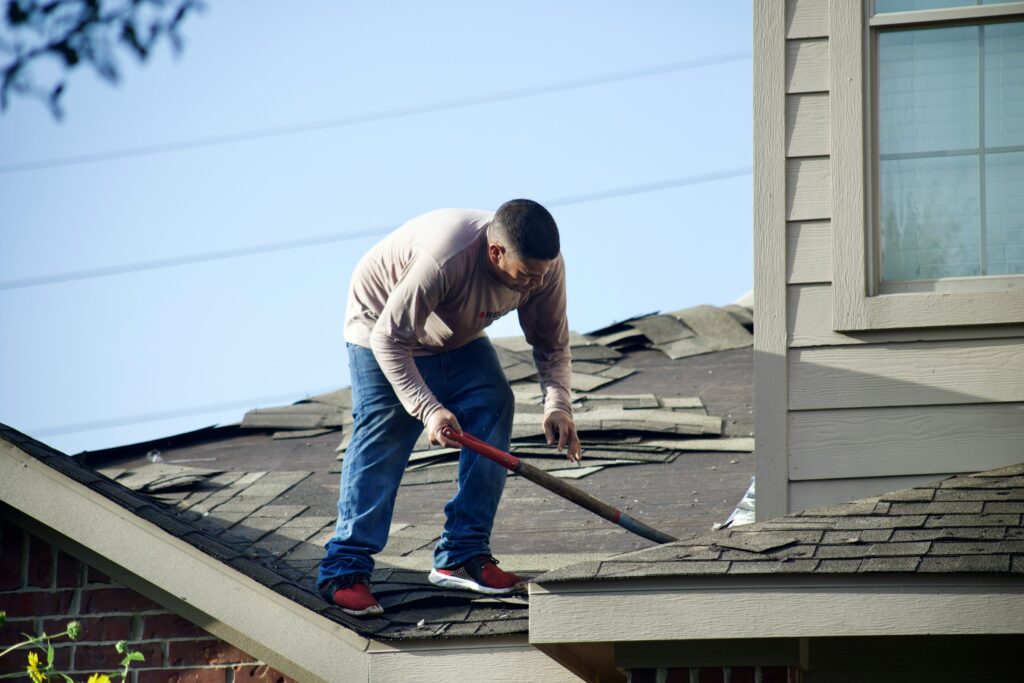
DIY Without Proper Knowledge or Equipment
Taking on home projects yourself can be rewarding and cost-effective. But when it comes to a complex system like your roof, certain DIY approaches can lead to more harm than good.
Why This Is a Problem
- Safety Risks: Climbing ladders or walking on a roof is inherently dangerous without the right safety gear and know-how.
- Incorrect Repairs: Even a well-intentioned fix can inadvertently cause more damage if the root problem isn’t addressed properly—for instance, applying extra caulk around a ridge vent might trap moisture rather than block water.
- Material Mismatches: Roofing materials differ greatly in installation requirements. Mixing different shingle types or attempting patch jobs with incompatible materials can undermine your home’s weatherproofing.
How to Avoid It
- Start Small: If you’re new to roofing, limit your DIY efforts to tasks like removing loose debris, clearing gutters, or replacing a single broken shingle under guidance from a credible tutorial.
- Lean on Experts: For bigger repairs or total replacements, consult licensed roofing contractors familiar with local building codes and structural considerations.
- Follow Manufacturer Guidelines: When you do smaller DIY fixes—like swapping out a damaged asphalt shingle—make sure you follow the installation instructions for the specific product.
A good rule of thumb: If you’re not entirely sure you can fix something safely and correctly, it’s more cost-effective in the long run to bring in a pro.
Selecting Materials Based Solely on Cost
Price is important, but homeowners who choose the cheapest materials to save immediate money may pay dearly over time. Each material—be it asphalt, metal, tile, or wood—has specific performance characteristics, lifespans, and maintenance requirements.
Why This Is a Problem
- Shorter Lifecycles: Lower-grade shingles or underlayment may wear out more quickly, requiring frequent fixes or early replacement.
- Incompatible with Climate: Not all roofing materials suit all climates. For example, clay tile can crack easily in extremely cold places, while certain asphalt shingles may degrade faster in areas with intense UV exposure.
- Aesthetics and Resale: Low-quality or poorly matched roofing can drop your home’s curb appeal. If you plan to sell at any point, a subpar roof can also affect buyer confidence.
How to Avoid It
- Research Different Materials: Look beyond cost alone—compare lifespans, energy efficiency, and local weather demands. Better Buildings Solution Center can give insight on energy-efficient roof types.
- Consider Life-Cycle Costs: Spending more upfront on higher-quality materials might reduce ongoing maintenance and extend intervals between replacements.
- Ask About Warranties: Warranties often reflect the expected performance—premium shingles generally offer more comprehensive or longer coverage.
Often, a mid-tier or top-tier roofing shingle that matches your climate can be well worth the investment, especially if you’re in your home for the long haul.
Poor Ventilation and Insulation
Rooftop ventilation plays a major role in your home’s overall energy efficiency and moisture control. Many homeowners pay too little attention to attic airflow and find themselves dealing with premature shingle failure or mold growth.
Why This Is a Problem
- Trapped Heat and Moisture: Poorly ventilated attics allow heat and humidity to build up, warping shingles from below and possibly leading to rot in wooden rafters.
- Ice Dams: In cold regions, inadequate insulation can melt snow on the roof; that water hits colder edges and refreezes, creating ice dams that back water up under shingles.
- Higher Energy Bills: An attic that can’t vent hot air in summer makes your cooling system work overtime, raising utility costs.
How to Avoid It
- Check Attic Vents: Ensure your soffit vents (intake) and ridge or roof vents (exhaust) are clean, unobstructed, and sized appropriately for your attic’s square footage.
- Upgrade Insulation: Maintaining proper insulation beneath the roof deck minimizes temperature extremes that degrade roofing materials. The U.S. Department of Energy’s guidelines offer specific R-value targets based on climate zones.
- Monitor Attic Temperatures: Use a simple humidity and temperature sensor. If it’s excessively hot or humid, you may need better ventilation or additional insulation.
In some cases, installing roof vents or baffles is a relatively straightforward improvement that pays immediate dividends in both roof durability and comfort.
Layering New Shingles Over Old Ones
When replacing a roof, some homeowners choose to install new shingles directly over the existing layer to save on labor and disposal costs. While allowed by many building codes (usually up to two layers of asphalt shingles), this should be approached with caution.
Why This Is a Problem
- Hides Underlying Issues: If the decking or underlayment has rotted areas, you won’t see them when you add a second layer. That hidden damage can spread without you realizing it.
- Added Weight: More layers add stress to your roof structure. While typically not an issue with a single additional layer, older homes, or those with borderline structural integrity, could suffer damage.
- Trapped Heat: Multiple layers can retain more heat, exacerbating warping and potentially shortening the life of your new roof layer.
How to Avoid It
- Carefully Inspect Decking: If you’re considering a second layer, make sure decking and underlayment are in solid condition—no soft spots, mold, or significant water damage.
- Understand Local Codes: Many jurisdictions limit the number of layers allowed, and for good reason. Always verify regulations with your local building department before proceeding.
- Consider Full Replacement: While it’s more expensive initially, removing old materials ensures your new roof goes on a stable structure. It also helps the next roofing job later, since you won’t have multiple layers to tear off.
In many cases, the long-term savings and benefits of removing the old roof layer outweigh the short-term convenience of “stacking” shingles.
Overlooking Flashing Details
Flashing is the thin metal sheeting (usually aluminum or galvanized steel) that seals roof intersections—around chimneys, vents, skylights, and where different roof planes meet. If flashing is installed incorrectly or allowed to corrode, water intrusion points multiply.
Why This Is a Problem
- Chimney Leaks: Even if your shingles are perfect, water can slip behind poorly sealed flashing at the chimney or skylights.
- Mold and Structural Rot: Undetected leaks near flashing can soak into rafters, insulation, and interior ceilings, creating slow-developing damage.
- Premature Roof Failure: Flashing is a roof’s frontline defense in “high-risk” areas. If it fails, you risk undermining the entire roof system.
How to Avoid It
- Inspect Flashing During Routine Checks: Ensure the metal isn’t bent, corroded, or lifting. Old caulk around the flashing should be replaced if it’s cracked or peeling.
- Consider Upgrades: In some areas, copper flashing is preferred for its durability and resistance to rust. It’s more expensive but can last significantly longer than aluminum or galvanized steel.
- Leave Complex Areas to Pros: If you need new flashing around a chimney or dormer, an experienced roofer can ensure it’s properly sized and sealed.
Even brand-new shingles can’t compensate for failing or incorrectly placed flashing. Keeping flashing in top shape is one of the smartest moves for preventing leaks.
Hiring the Wrong Contractor
Choosing a contractor purely on price or availability can lead to subpar work, unverified materials, or poor customer service. Roof installation is complicated—small errors like misaligned shingles or inadequate underlayment can lead to costly fixes.
Why This Is a Problem
- Limited Warranties: Manufacturers often require certified installers to honor the full product warranty. Using an unlicensed or inexperienced roofer might void that coverage.
- Risk of Scams: In some areas, unscrupulous companies appear after storms, offering cheap fixes that don’t actually solve underlying problems. You might find them gone by the time you notice anything’s wrong.
- Costly Repairs: If the work wasn’t done to code or by industry best practices, you can face repeated leaks or issues that demand more time and money to correct.
How to Avoid It
- Check Credentials: Always verify licensing, insurance, and relevant industry certifications. Look for reviews on trusted consumer websites or ask neighbors for references.
- Get Multiple Quotes: Compare not just the final costs, but also warranties, materials, and the contractor’s approach. A thorough inspection or consultation is a good sign they’re taking your roof seriously.
- Ask for Written Agreements: This should include a detailed scope of work, material list, estimated start and completion dates, and payment schedule.
When you find a reliable roofer who knows local conditions, building codes, and best practices, you gain more than a service—you build a relationship that supports your home’s well-being for years to come.
Bonus Tip: Keep an Eye on the Gutters
While gutters aren’t strictly part of your roof, they’re highly interrelated. If gutters clog or fail to channel water away from your home, that moisture can seep into the edges of your roofing system—leading to rot in the fascia boards, eaves, or soffits.
Gutter Mistakes to Avoid
- Infrequent Cleaning: Leaves, twigs, and dirt build up quickly, especially in areas with tall trees. Too much debris can create leaks by pushing water under shingles.
- Ignoring Downspouts: Downspout extenders or splash blocks should direct water at least a few feet from the foundation. Otherwise, it can loop back to the roof line over time.
- Failing to Repair or Replace: Sagging or rusty gutters create water pockets. Addressing minor repairs promptly keeps your entire roof perimeter in better shape.
For a deeper dive on best practices, check out This Old House’s gutter cleaning tutorial, which includes how to do it safely and spot problems before they worsen.
Creating a Proactive Roofing Strategy
Steering clear of these seven pitfalls is simpler when you adopt a consistent approach to roof care. Here are some final strategies to keep your roofing system sound:
- Schedule Maintenance: Use your phone or calendar to set reminders for biannual inspections—once in spring, once in fall.
- Document and Photograph: Each time you or a pro inspects the roof, take pictures of any damage or repairs. This helps you track changes over time and file insurance claims if needed.
- Stay Current on Warranty Coverage: If you buy new shingles or do a full roof replacement, keep track of the warranty details. Understand what’s included—e.g., workmanship, materials—and for how long.
- Budget for Future Repairs: Even well-maintained roofs eventually need attention. Setting aside 1%–2% of your home’s value each year is a decent rule of thumb for general home repairs, which you can tap into if a roofing issue arises.
Final Thoughts
A roof in good condition shields you and your family from wind, rain, snow, and intense sunlight. Yet many homeowners skip straightforward preventative steps—like routine inspections or calling a trusted pro to handle tough repairs—that could avert major headaches later.
From ignoring small leak symptoms to skimping on proper ventilation, the mistakes outlined here are widespread, but they’re also avoidable. By understanding these pitfalls and practicing proactive care, you can extend your roof’s life, maintain your home’s structural integrity, and preserve its market value. It’s all about informed vigilance coupled with the right professional guidance. Take these lessons to heart, and your roof will reward you with fewer leaks, longer durability, and uninterrupted peace of mind, season after season.