Creating a breathtaking holiday display is a highlight of the season. In Southern Oregon communities like Medford, Ashland, Grants Pass, and Phoenix, homeowners look forward to bringing festive cheer to their neighborhoods. Yet, decorating can come with hidden risks, especially if you’re navigating steep or slippery roofs, handling electrical connections in the cold, or using the wrong fasteners. This guide explores practical and proven methods for a memorable holiday display that keeps everyone safe and your roof in prime condition.
Below, you’ll find insights on the hidden dangers of do-it-yourself light installations, how to prevent roof damage, and how proper techniques and pre-season roof inspections can give you the dazzling results you crave, without the headaches.
The Hidden Dangers of DIY Christmas Light Installation in Southern Oregon
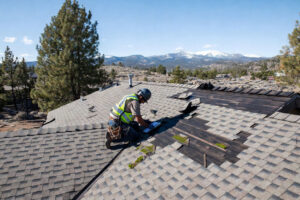
When you’re caught up in the excitement of transforming your home into a holiday wonderland, it’s easy to underestimate the risks. For instance, climbing ladders and carrying bulky light reels alone can put you in precarious situations:
- Ladder accidents: Unsteady or improperly placed ladders can topple, especially on uneven ground or when used in rainy or icy conditions. According to OSHA ladder safety guidelines, thousands of accidents arise each year from improper ladder use.
- Exposure to the elements: November weather in Southern Oregon can bring cold temperatures and slippery roofs, increasing the likelihood of falls.
- Strain on time and resources: A typical DIY installation can span multiple weekends, leaving you weary as you juggle holiday preparations and daily responsibilities.
While safety is always the biggest concern, the potential for roof damage should not be ignored. An accidental step off the ladder onto a delicate section of shingles could lead to leaks, rot, or mold. This is why balancing aesthetics with reliable safeguards is absolutely essential.
How Improper Light Installation Damages Your Roof Investment
Festively illuminating your home can become expensive if your methods harm the shingles, gutters, or underlayment. The Consumer Product Safety Commission highlights how improper fasteners, from simple nails to heavy staples, can puncture your roof over time and jeopardize its protective integrity.
Below are some common DIY pitfalls that cause expensive roof damage:
- Staples and nails: Driving metal fasteners into shingles or fascia can create micro-tears. Over time, water seeps in more easily, causing rot or mildew to spread.
- Heavy electric cords: When cords rest on roof peaks or valleys, friction can wear away granules on asphalt shingles.
- Poor wire management: Wires and extension cords sneaking under shingles often create hidden pockets where water accumulates.
- Weight distribution: Using rope lights or clustered bulbs can stress certain roof areas. If your roofing material is older or fragile (such as clay tile), even moderate pressure can crack individual pieces.
Once water leakage starts, you may not notice the damage until the next rainy season, costly repairs may be waiting in the new year, along with mold or insulation problems. Early planning and professional installation methods help protect your long-term roof investment.
November Weather Challenges Why Timing Matters in Medford
Medford’s November weather often shifts quickly from mild to bone-chilling. If you wait until weeknights in late November or early December to tackle your light installation, you might be battling cold winds, occasional frosts, or rain-slicked shingles. This is also when professional schedules fill up!
- Early November advantage: By scheduling installation early in the month, you avoid potential weather-based delays. You’ll also have ample time for additional decorations, final touches, and any unforeseen adjustments.
- Beat the holiday rush: Local installers are inundated with requests once Thanksgiving nears. Booking sooner means you can secure your slot and benefit from specialized roofing knowledge from trusted Southern Oregon roofing and exterior professionals.
Early installation also means more days to enjoy your holiday lights, especially before traveling to visit loved ones, or hosting them at your home. And if you want to explore other exterior upgrades, such as gutter protection systems or roof maintenance best practices, planning in the fall offers convenient touchpoints for a seamless approach.
Safe DIY Installation Techniques That Protect Your Roof
If you’re planning to hang your own lights this season, following roof-safe methods is essential. Here’s how to protect your roof while creating a beautiful display:
- Roof-safe clips: Instead of nails or staples, use specialized clips designed to grip gutters or shingle edges without piercing them. These are available at most hardware stores.
- Strategic wiring: Route electrical lines along the gutter line and eaves using safe ladder techniques for homeowners, staying clear of vulnerable shingles and reducing tripping hazards.
- Pre-installation roof check: Before decorating, schedule a HomeMasters roof inspection to identify potential hazards like loose shingles or cracked flashing that could worsen if you climb on the roof.
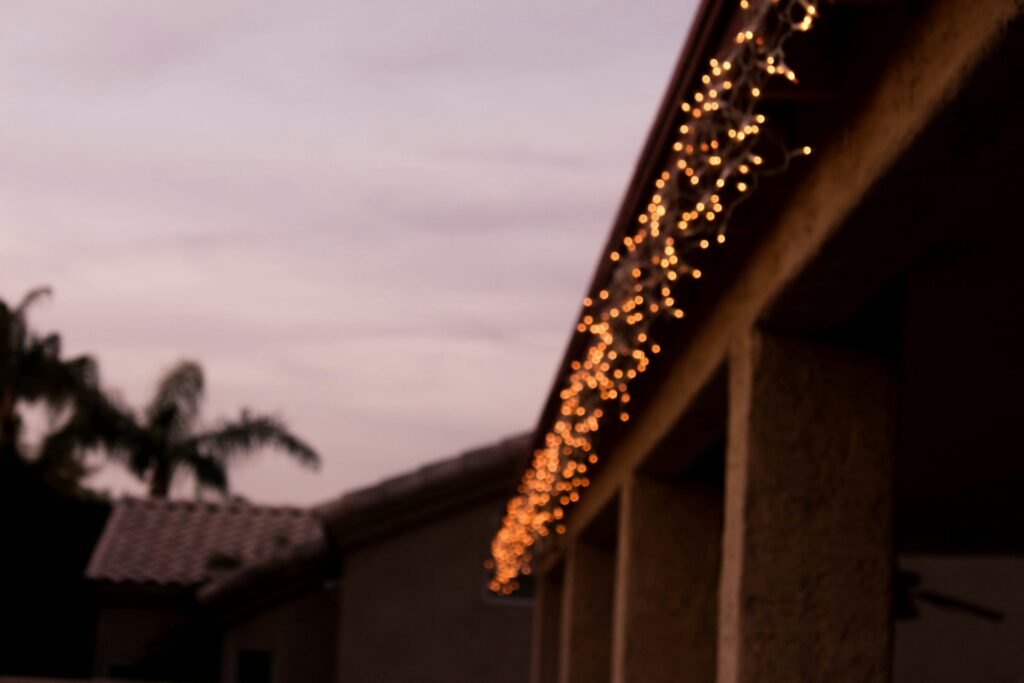
- LED lighting: LED bulbs generate less heat and put less thermal stress on shingles or other materials. Switching to LED holiday lights also lowers energy costs and reduces the strain on your circuits.
These roofing-conscious strategies ensure you get a spectacular display while protecting your investment. Before you start, let HomeMasters inspect your roof to ensure it’s in good condition for the season ahead.
Roof-Safe Attachment Methods vs. Damaging DIY Approaches
Before you climb the ladder this holiday season, it’s important to understand how your choice of light-hanging method can impact both your safety and your roof’s long-term health. The table below compares common DIY approaches, like nails or staples, with roof-safe methods that use proper clips and tools recommended by HomeMasters’ roofing experts.
| Factor | Damaging Methods (Nails/Staples) | Safe Methods (Proper Clips) |
| Safety Risk | High (ladder accidents, cold weather falls) | Lower with proper planning and roof inspection |
| Roof Damage Potential | High (staples, nails puncture shingles) | Minimal (clips grip without piercing) |
| Time Investment | 8–16 hours | 8–16 hours (plan accordingly) |
| Equipment Costs | $50–$200 (nails, staples, basic tools) | $200–$400 (quality clips, proper tools) |
| Long-term Roof Health | Poor (creates leak points) | Excellent (preserves roof integrity) |
| Repair Risk | High (may need HomeMasters repairs) | Low (prevents damage) |
| Best For | Never recommended | All DIY installations |
Roof damage often comes down to techniques. Improper tools like roofing nails or staplers can punch holes, destroy shingles, or dent soft aluminum gutters. Conversely, specialized roof-safe clips and precise planning limit exposure to these hazards.
Planning Your Holiday Display Design and Safety Considerations
A beautiful display safely installed starts with an organized plan. Here’s a quick checklist to guide your vision:
- Sketch a design: Identify which sections of your roofline, eaves, or entryway you want to highlight. Then, consider how lights will transition around edges and corners.
- Check existing light strings: Ensure they are UL-rated for outdoor use and test for frayed wires or broken bulbs.
- Upgrade to LED: According to Energy Star’s data on LEDs, LED holiday lights use 75% less energy than traditional options, reducing your electric bill and your carbon footprint.
- Proper timers and controllers: Timers prevent overuse and reduce potential fire hazards. They also eliminate the hassle of manually plugging and unplugging lights.
By organizing your approach and verifying the safety of your cords and connections, you maintain the show-stopping sparkle without the risk. Moreover, it’s easy to bring existing lawn decorations, wreaths, or inflatables into the mix when you coordinate from the start.
Architectural Considerations for Ashland, Grants Pass, and Medford Homes
Southern Oregon’s diverse architecture offers a delightful range of creative options, but also distinct considerations regarding installation:
- Historic Ashland homes: These often feature delicate trim, vintage roofing materials, and intricate eaves. Extra care is needed to avoid piercing older woodwork or clay shingles.
- Grants Pass suburban developments: Newer homes might have standardized roof lines, offering simpler installation points for roof-safe clips along the gutters. This uniformity also speeds up the process and lets you experiment with symmetrical designs.
- Medford’s mix of ranch and two-story structures: Some are single-story ranch homes with wide overhangs, while others are multi-level dwellings with complex roof angles. Each building type can have unique challenges for ensuring consistent spacing and illumination.
- Phoenix, OR DIY culture: In many small towns, there’s a tendency to tackle projects on your own. Yet, the same hazards apply when climbing on the roof in wet or cold conditions. Even homeowners experienced in repairs and remodeling can overlook subtle safety issues when hustling through a holiday lighting session.
Understanding these architectural nuances helps you plan safe installation routes that minimize damage to crown molding, gutters, or shingles. If you’re unsure about your roof’s vulnerabilities, schedule a pre-decoration inspection with HomeMasters.
Removal and Storage Preventing Spring Roof Damage
Taking down holiday lights can be an afterthought, you pack them away in a rush before heading back to work after the new year. Although it’s tempting to leave them up until spring, prolonged exposure can degrade light cords and compromise your roof’s integrity. Consider these crucial steps:
- Timely removal: Schedule takedown by mid-January, if not sooner. Allowing lights and clips to remain through winter storms increases wear and tear on both the roof surface and the lights themselves.
- Proper takedown methods: Pulling or yanking on cords can pry off shingles or loosen guttering. Carefully unclip each attachment point. If you notice any damage during removal, contact HomeMasters for prompt repairs before winter storms worsen the problem.
- Organized storage: Neatly coil strings and label them by zone of the house. Proper storage prevents twisted wires or broken bulbs, speeding up next year’s preparation.
Remember, even the best roof-safe clips can weather over time if left in place for months. Spending a bit of extra effort in January or February means you’ll protect your roof from moisture intrusion and keep your lights in excellent condition for next year.
The Value of Pre-Holiday Roof Inspections
Protecting your roof during the holiday season starts before you hang a single light. Here’s why a pre-season HomeMasters roof inspection is a smart investment:
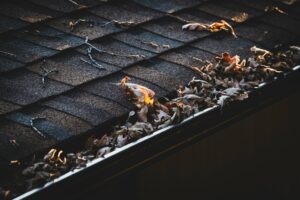
- Identify vulnerabilities: A professional inspection reveals loose shingles, damaged flashing, or weak spots that could worsen if you walk on them while decorating.
- Lower risk of accidents: Knowing your roof’s condition helps you plan safer installation methods and avoid compromised areas.
- Extended roof longevity: Preventing unnecessary stress on weak spots and addressing small issues now helps delay expensive repairs or replacements.
- Peace of mind: If roof damage occurs during decorating, HomeMasters can quickly repair it before winter storms arrive.
- Post-season repairs: After you remove your lights in January, HomeMasters can assess and fix any damage that occurred during the season.
When you protect your roof proactively, you avoid the hidden expenses of emergency winter repairs. Schedule your pre-holiday inspection with HomeMasters’ Southern Oregon team.
Holiday Roof Safety FAQ: Protecting Your Roof While Hanging Christmas Lights
Below are answers to some of the most common questions Vancouver and Southern Oregon homeowners ask about staying safe on the roof during holiday light installation.
Will Christmas light clips damage my shingles or gutters?
They can , especially if clips slide under shingles or nails are used for attachment. Any penetration point can invite leaks or loosen shingles in winter winds. HomeMasters recommends non-invasive, gutter-mounted clips and avoiding walking directly on steep or brittle roofing materials. If you’re unsure, schedule a quick roof safety check before decorating.
When’s the safest time to hang holiday lights?
Early to mid-November is best. Weather conditions are still mild, giving you a chance to inspect your roof and gutters before cold rain or frost arrives. Installing early reduces fall-risk hazards and helps prevent damage from sudden winter storms.
Can I safely hang lights on a tile or older roof?
Use extreme caution. Fragile materials like clay or slate can crack under weight or pressure. Instead of climbing up, use extension poles or clips that attach at the gutter line. For older roofs or those needing inspection, HomeMasters can assess stability and ensure your setup won’t cause long-term damage.
Should I walk on my roof to install Christmas lights?
Generally, no. Most roofing materials aren’t designed for repeated foot traffic, especially in cold weather when shingles can become brittle. Even experienced roofers use safety harnesses and proper support. Whenever possible, decorate from a ladder or the ground to protect both yourself and your roof.
What should I check before hanging lights?
Look for loose shingles, clogged gutters, and any signs of moisture or moss buildup. Addressing these issues before you decorate helps prevent slips and protects your roof from added stress during the rainy season. If you haven’t had a roof inspection this year, schedule one before installing lights.
What if I notice roof damage while decorating?
Stop and contact a professional immediately. Climbing or walking on compromised areas can worsen leaks or structural weaknesses. HomeMasters’ local team can perform a same-week inspection and handle minor repairs before major winter weather sets in.
Your Next Step Toward a Safe and Festive Season
A beautifully lit home should never come at the cost of your safety or roof’s integrity. Before you climb a ladder or clip that first light, take time to inspect your shingles, gutters, and flashing, or let HomeMasters handle your exterior home repairs for you.
Our team ensures your roof is secure, debris-free, and ready to handle both the holidays and the months of wind and rain ahead.Schedule your free pre-holiday roof inspection today and enjoy a season that’s bright, safe, and stress-free.