What Goes Into The Layers of Shingle Roofing?
editMost homeowners never get up close to their roof. If you’re cleaning your gutters, you probably do get a birds eye view, but don’t realize there are many layers that make up your roof. All you see when you look at the roof are the shingles, slate or tile on top. You typically aren’t interested in the roofing layers that keep your home dry until you have a problem, like light shining into the attic or ice dams in the winter.
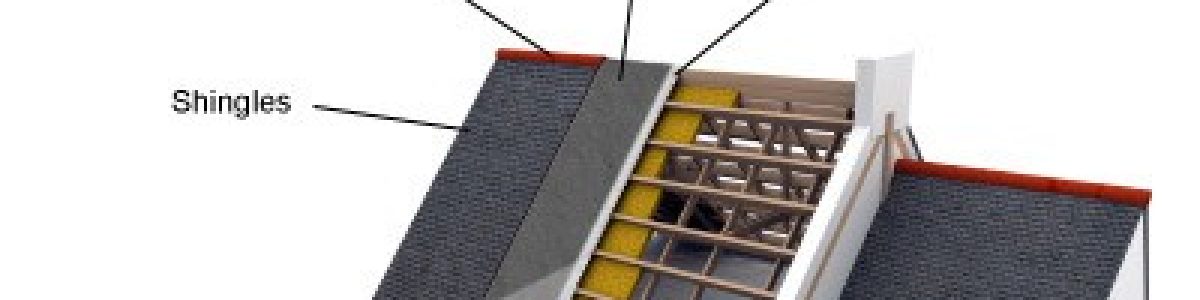
Roofs might look simple but they’re rather complicated. There are multiple layers of materials, and they have to be installed in the right sequence … and the right way, in order to withstand harsh weather and keep your home dry. For example, there’s a starter course of roofing shingles installed at the eaves before the roofing shingles you can see.
Roofing Layers from the Framing to the Shingles
So we’ll start at the bottom of the deck, and work our way up through all the roofing layers until we reach the shingles and sunshine above your roof.
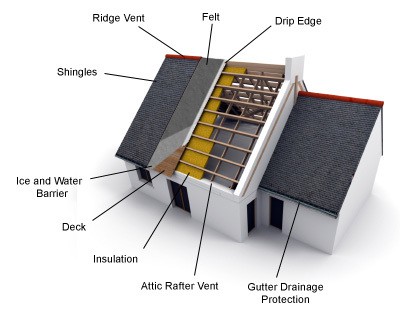
- Framing – includes the roof trusses that sit at the top of your house and support the weight of all the materials used to build your roof. Some materials like ceramic tile and slate are much heavier than asphalt shingles, so the structure must be designed for the materials used.
- Insulation – in your attic is used to reduce the loss of heated air rising up from your home. Attic insulation will be found on the attic floor or when the attic is finished, between the rafters over the attic ceiling.
- Ventilation — is critical in attics to rid the space of heat and moisture that enters from the house below. Without adequate ventilation, heat and moisture can cause damage to the framing, insulation and the plywood sheathing that sits on top of the rafters. You may also find yourself dealing with mold and mildew problems.
- Roof deck – is the roofing material that sits on top of the roof trusses. Most roof decking is made from sheets of plywood.
- Water shield – is the next roofing layer, that creates a water-proof barrier where ice or water can buildup near the roof eaves. It’s usually a peel and stick product that adheres directly to the roof deck.
- Underlayment – is usually felt or fiberglass paper, that covers the entire roof deck. It is water-resistant to allow moisture to pass through. It will prevent the passage of water in its liquid form.
- Shingle starter strips – are either purchased or created by snapping regular shingles in half. They’re installed at the eaves, pointing in the opposite direction to create a first line of defense against wind uplift along the edge of the roof.
- Roofing material – is where most homeowners focus their attention with hundreds of materials, styles and color to pick from. The five main types of roofing materials are asphalt shingles, cedar shakes, concrete or ceramic tiles, metal sheets and rubber used for flat roofs.
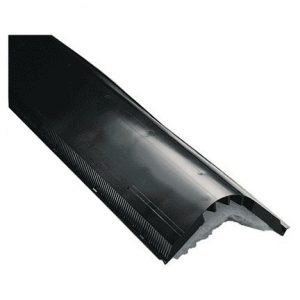
- Ridge vents – are at the top of your roof, covered by roofing material but with a gap designed to allow warm, moist air to escape from the attic.
- Flashing – is made from sheet metal and used to prevent water from penetrating seams where different materials meet on the roof (and other parts of your home’s exterior). Flashing along the roof eaves are called drip edge, and along chimneys it’s called step flashing. Flashing is also used around skylights, bathroom vents and any other features sticking up through the roof.
comments
comments for this post are closed